On the 107th day,.. Jesus finished the kitchen!
See below for the pictures...
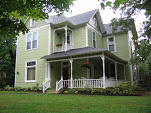
Yes, we are finally finished and moved into our kitchen! After a very long summer of feeling like we were camping out, we now have a finished, functional kitchen. It all started May 3, and ended September 22. "Before" pictures are on the left, "After" pictures are on the right.


We wanted to stay as close to historic as possible, though we weren't exactly sure when our kitchen was originally put in. We started the project by (and when I say "we", I mean Jesus and his helper) gutting the walls and floors down to the studs and joists. We found that the window over the sink had originally been a full length window. A neighbor of ours, whose house was built in 1905 said she knew for certain her house was built without plumbing. So, obviously, since ours was built in 1895, it had none either. The floor joists were then sistered to make them level and flat. The original joists and studs were actually in really good shape, they had just warped over time. The wall studs had hardened and cured so much that drywall screws would not go into them. Jesus ended up using metal penetrating screws. We opened up a large space between the two rooms, where the door had once been. We kept the chimney stack, and decided to enclose it again rather than leave the brick exposed. The brickwork was really messy, it was obvious it was originally built to be encased. We used slate tile flooring, soapstone countertops, and oil rubbed bronze for the fixtures and accents. The glass in the transoms above the opening is from the original windows, which we replaced with double hung (non-drafty & functional) windows. The ceiling was still in good shape, so we kept it and installed tin ceiling tiles in the kitchen and coffered beams in the breakfast room. While the flooring in the breakfast room was in pretty good shape, the flooring in the kitchen had been patched and layers of vinyl added. The easiest solution was to use slate in both rooms, but we did keep the wood from the breakfast room to repair other rooms.
-cara
Yes, we are finally finished and moved into our kitchen! After a very long summer of feeling like we were camping out, we now have a finished, functional kitchen. It all started May 3, and ended September 22. "Before" pictures are on the left, "After" pictures are on the right.


-cara
posted by C&C at 9:49 PM
![]()
![]()

10 Comments:
Wow. This looks fantastic! You're making me consider white cabinets again.
Wow. Just wow. Those cabinets are really to die for.
OH look at that, (gobble gobble gobble!) So now that you guys have a dishwasher, there is NO excuse for a big pile of dishes in the sink!!! Look forward to seeing it. Maybe moving to Fville, will keep you posted. (will be there this weekend looking at a house) Love you guys!
Love, love, love it - though you really had made the most of the previous kitchen too. I bookmarked the last post and may have to borrow a few of your ideas. Congratulations!
OMG, your kitchen is fabulous!!! I love how you opened it up to the dining room. Very unexpected in a vintage home! See Dave and I are chicken when it comes to major renovations. We are once we start but its just getting started!
I love how you made the kitchen match the Victorian style of the house. Great job. I can sympathise with you; when we did our kitchen we took it down to the studs too, but our house isn't so old so it went a little faster. But it still took us AGES to finish it.
oh gosh, i absolutely ADORE what you did with the kitchen. it looks FABULOUS.
Very Nice!
What dimension is your kitchen? I love how you designed it.
The kitchen is about 14'x 9', and the breakfast room is about 14'x14'. Well, as best as I can remember anyways!
Post a Comment
<< Home